Showing posts with label JABlog Photo Challenge. Show all posts

Monday, April 27, 2015

Photo Challenge #20: Spring Into Action!


This is my weekly self-imposed challenge to improve my budding photography and photo editing skills over the coming year.  I just started shooting with a "real" Canon digital rebel camera a year ago, after upgrading from iPhone only shots.  I've been enjoying experimenting with the hobby and also using some of the skills I'm learning to improve my beer photography for the rest of this blog as well.  Hopefully folks are enjoying taking this journey with me!  As always feel free to add your own link at the bottom of the page if you want to play along…

Last week I tried out silk screen or cut-out effects.  This week I left it a little more open for pictures of Spring!  I spent some time in the past 2 weeks at the Arboretum and saw some tiny signs of life among the dead leaves and browns of Fall.  There wasn't much greenery to be caught on the larger lens, so I switched over to my macro lens for a closer look.  At the time I'm posting this, there is much more greenery abounding, but I thought these few spots of color were more striking...


Wild raspberry cane ready for action!

These were tiny!
The framing isn't perfect in this one, but I liked the contrast between the brown branch and the burst of blue from the flower.

I have no idea what type of flowers these are, but I found them thrusting up from the forest floor in a few spots.

And last but not least, I found this lone battered looking butterfly clinging to this sapling in a high wind!
So there you go, a taste of Spring in Minnesota!  For the next two weeks the assignment is Travel Photography!

Monday, April 20, 2015

Photo Challenge #19: Silky!


This is my weekly self-imposed challenge to improve my budding photography and photo editing skills over the coming year.  I just started shooting with a "real" Canon digital rebel camera a year ago, after upgrading from iPhone only shots.  I've been enjoying experimenting with the hobby and also using some of the skills I'm learning to improve my beer photography for the rest of this blog as well.  Hopefully folks are enjoying taking this journey with me!  As always feel free to add your own link at the bottom of the page if you want to play along…

Last week I tested out my new telephoto lens for the challenge.  This week I'm experimenting with replicating the look of the old silk screen technique that my mom used to used when I was growing up.  The idea when using digital editing is to basically cut out some of the gradations of color, limiting it to 3-8 main colors, and then alter the lines/borders of those colors to be less defined.  I mostly used the Photoshop Elements Cutout filter for these.  I'd be glad to hear if anyone else has other ideas for doing this type of effect!


I didn't love this picture on it's own, but the effect makes this stand out a bit more.

This picture was from Kerkom Brewery in Belgium.  I loved the rustic look of old wagon wheels casually leaned up against the peeling wall.  

I like the visual of this background a lot, while the already well defined Monarch stays pretty clear.

This last one was taken in Maastrict, Netherlands.  I used the Cutout filter and then added back a bit of detail with the Posterization filter to add more lines.

So there you go, fun with a new filter effect!  Sometimes cutting out detail can be as striking as super defined and clear photos.  Feel free to link your page/blog below.


Next week I'm going to be posting pictures of Spring!  So get out there with your camera and take some pictures of the changing season.

Monday, April 13, 2015

Photo Challenge #18: Get Up Close


After playing along with Erin's 30 Word Thursday weekly challenge on her Treasures Found Blog for the past year I have finally taken the plunge and started taking photography more seriously.  Starting with my iPhone, I soon found that the limitations of that device were getting to me.  Upgrading to a Canon Eos Digital Rebel SL1 camera, I've started experimenting more with technique.  I have also invested in Photoshop Elements 12 and most of my post-production on photos will be from that program.  As a way to force myself to try new things, I'm doing a weekly photo challenge--each week focusing on a different photography or editing technique.  Some of these may be simple and others more difficult.  I encourage any of my readers to take part in the challenge!


Photo Challenge #18: Get Up Close

Last week I messed around with solarization, taking photo manipulation to extremes.  This week I finally got to take out my new Tamron telephoto lens for a spin.  I seriously thought about buying one of the more expensive professional (gray bodied) Canon lenses, but I balked at the cost, size, and my lack of experience with that type of lens.  I ended up going with a middle of the road lens that was on sale and had two rebates, so I ended up getting a decent lens for a good price--enough to get some experience with and decide later if I need to upgrade.  

With Spring finally upon us (despite snow last week) I took a trip to the Minnesota Landscape Arboretum this past Sunday for a photo shoot.  The wind was up and I think this kept the birds from flying around much.  I got there a little later than I hoped for, around 10 AM, so much of the wildlife was already well away from the paths by then.  I really need to go back right at 8 AM, but it is difficult to get myself up that early on a day off!  Still, I found a few things to take pictures of, and test out the specs of my new lens.  The biggest thing I discovered is that even with the auto-stabilization feature camera blur from increased shake is hard to avoid when hand held.  I'm unclear how professional photographers get wildlife to hold still while they set up their tripod...I should as Jim Stroner and Rick Spaulding about this.

So there I was "quietly" rampaging about several trails in search of wildlife to photograph, and who should I see but the cutest little chipmunk?  This guy was very photogenic and let me take a lot of pictures over about 10 minutes before a family with a couple of young children walked by.  I did get some practice with taking pictures of a rapidly moving subject...


Moving on I found a couple of small squirrels, but they were far enough away that none of my photo's were fantastic.  I found very few birds, and scared up a bunch of wood ducks at one point was wasn't ready to try to catch them in flight.  I swear I was being stealthy.


This female cardinal didn't sit still long enough for me to get my settings right, so all I got was this silhouette.  I went for black and white since the blue background made it look strange.  Not too bad once I did this.


This is not a great picture, but I like it anyway!  I'm assuming this male goose was "marking his territory" by trumpeting every minute or so.  There was another (probably male) goose nearby and I think this guy was trying to intimidate him.  He would also look at me from time to time and give me a good honking as well.  I should have turned my camera to video, but didn't even think of it.  This is why I'm an amateur photographer.

So there you go, some shots from my new lens.  I'm excited about the ability to get closer up to things, but it is significantly longer and heavier than my kit lens or even my Macro lens.  This is not the lens I'm going to carry around when wandering around a new city.

If you have some good telephoto shots and want to share, please link your page/blog below and share with us!


Next week's photo challenge will be using the silk screen effect.  My mom used to be a photographer when I was younger and I remember helping her develop film in our dark and centipede filled basement lit only by one dangling creepy red light.  She would often use silk screen to make prints and shirts, and I remember helping out with that process as well.  I still have a couple of these now rare prints hanging up in my home, and one of my partners at work actually discovered one of these classics in her stash!  So next week I want to use Photoshop Elements to mimic the look of silk screen...without all the messy ink!

Wednesday, April 8, 2015

Photo Challenge #17: The Sabbatier Effect


After playing along with Erin's 30 Word Thursday weekly challenge on her Treasures Found Blog for the past year I have finally taken the plunge and started taking photography more seriously.  Starting with my iPhone, I soon found that the limitations of that device were getting to me.  Upgrading to a Canon Eos Digital Rebel SL1 camera, I've started experimenting more with technique.  I have also invested in Photoshop Elements 12 and most of my post-production on photos will be from that program.  As a way to force myself to try new things, I'm doing a weekly photo challenge--each week focusing on a different photography or editing technique.  Some of these may be simple and others more difficult.  I encourage any of my readers to take part in the challenge!


The Sabbatier Effect!

This week I wanted to try a cool technique I discovered in a photography book.  The Sabbatier Effect is also called Solarization.  The effect was originally seen when the film negative was extremely overexposed (usually from the sun, hence the name solarization.) The effect was imitated in the dark room by briefly exposing the negative to a bright light.  In this day and age of computer graphics and digital photography we can do similar or even more extreme things with this technique.  I have read that bold lines and contrast differences in photos make for a more impressive effect so I looked at some architectural photos I took when in Belgium this past spring.


I struggled a bit getting this photo to look right and am not entirely happy with the final result.

On the other hand, the effect in this version is striking and the texture of the moon is more noticeable.  

I liked the contrast of the dark statue and the lighter brick, but the gloomy day just didn't make this pop like I wanted it too.

So, with the Solarization we get reversed contrast, bringing the statue more into the foreground and the stained glass becomes much more interesting.
Ok, so there you go!  Color and black & white versions of the effect.  Feel free to take part in the challenge by linking your page/blog through the free link tool below.


Next week I'm going to try to actually use my new telephoto lens.  I have been getting by with my kit lens and a Tamron Macro lens up to now.  I'll just be messing around with what effects I can do with the ability to zoom!  If weather continues to be lousy, I may change my challenge...


Monday, March 30, 2015

Photo Challenge #16


After playing along with Erin's 30 Word Thursday weekly challenge on her Treasures Found Blog for the past year I have finally taken the plunge and started taking photography more seriously.  Starting with my iPhone, I soon found that the limitations of that device were getting to me.  Upgrading to a Canon Eos Digital Rebel SL1 camera, I've started experimenting more with technique.  I have also invested in Photoshop Elements 12 and most of my post-production on photos will be from that program.  As a way to force myself to try new things, I'm doing a weekly photo challenge--each week focusing on a different photography or editing technique.  Some of these may be simple and others more difficult.  I encourage any of my readers to take part in the challenge!

OK, I finally missed one week's challenge.  I blame illness that interfered with my photo taking, editing, and posting.  Oh well, I eventually got here!

JABlog Photo Challenge #16: Photo Journalism

This week's challenge was to document an activity, sport, job, or something else in photo form.  I thought this was a good one to do to get me back into actively taking pictures instead of just using old ones from last summer.  The trick to taking pictures like this is to convey meaning without words to describe what you are seeing.  The other challenge is that you are taking these pictures on the fly without the ability to control the surroundings and lighting as much as you would in some other types of photography.

I recently realized that I only had a few pictures of my homebrewing set-up, and none that have been taken recently.  All the shots I did have available were from my iPhone.  I took this as an opportunity to document my main hobby.  And yes, I will describe what things are for the novice!  The biggest trick to doing this was trying to take pictures and actually do the brewing--the most interesting active parts of the job, I was unable to document well since I only have so many hands!  It was also very cold and I had to do this in the dimly lit and steamy garage.  Oh well!

First step is to take the base grain (Wyerman Pilsner) and measure out how much I need for the full batch.
Next up is to grind that grain using a power drill (or by hand if you want a work-out!)

What makes up 90% of beer?  Water!
Add heated water to the mash tun equipped with a false bottom
Now we have warm gloppy cereal!  Let this sit for an hour and let those enzymes break down the sugars for us...
Drain the final product (wort) into the brew pot, get to a boil and add hops...


And collect the cooled wort into a carboy!  All that is left is adding yeast and oxygen and giving it time to ferment!

So there you go, the best I could do!


Next week I want to try to emulate the solarization, or Sabatier Effect, where dark and light are reversed in a photo.  This makes for a strange effect, but should be fun to mess around with!  

Wednesday, March 18, 2015

Photo Challenge #15: Olde School


After playing along with Erin's 30 Word Thursday weekly challenge on her Treasures Found Blog for the past year I have finally taken the plunge and started taking photography more seriously.  Starting with my iPhone, I soon found that the limitations of that device were getting to me.  Upgrading to a Canon Eos Digital Rebel SL1 camera, I've started experimenting more with technique.  I have also invested in Photoshop Elements 12 and most of my post-production on photos will be from that program.  As a way to force myself to try new things, I'm doing a weekly photo challenge--each week focusing on a different photography or editing technique.  Some of these may be simple and others more difficult.  I encourage any of my readers to take part in the challenge!

Photo Challenge #15: Olde School

This week's challenge was to do a sepia effect on a couple pictures to give them an old fashioned look.  Looking through my pictures, I found that the ones most appropriate for this challenge were scenes and objects that would fit in back in time.  I found plenty of pictures in my batch from Belgium last spring, but many of the pictures were already fairly monochrome so the change didn't jump out as well as I would have liked.


1) Wheels within wheels.  This photo was taken at one of the small stables at the Minnesota Renaissance Festival this past summer.  It seemed to work well with the old fashioned theme!


I used a similar picture for a previous challenge--so sue me!


2) Bridge.  I like the timeless feel of this edited version.  The contrast in the trees isn't quite as good as I would have liked, but the sky was overcast on that day.  This one was taken at the small hotel (pictured above) in Chiny, Belgium.


3) Museum.  This was actually a museum in Ireland, taken with my old iPhone in 2011.  I'm actually not sure which version of the picture I like the most.  The contrast of the blue sky in the original is pretty cool, but I feel like the light shining off the top of the building is more noticeable in the sepia toned photo.  Oh, if I had had my Canon with me...

For any budding (or professional for that matter) photographers who want to play along, just post a link to your page/blog below.


Next week, we are going to take advantage of the improved weather.  I want documentary photos.  Take pictures of an action, a job, or activity.  Get a feel for what is going on by using different ways to capture action and ingredients.  I'll be homebrewing a batch of lambic to fill a barrel, and will likely use that as my muse...

Monday, March 9, 2015

Photo Challenge #14: Welcome to the Funhouse


After playing along with Erin's 30 Word Thursday weekly challenge on her Treasures Found Blog for the past year I have finally taken the plunge and started taking photography more seriously.  Starting with my iPhone, I soon found that the limitations of that device were getting to me.  Upgrading to a Cannon Eos Digital Rebel SL1 camera, I've started experimenting more with technique.  I have also invested in Photoshop Elements 12 and most of my post-production on photos will be from that program.  As a way to force myself to try new things, I'm doing a weekly photo challenge--each week focusing on a different photography or editing technique.  Some of these may be simple and others more difficult.  I encourage any of my readers to take part in the challenge! 


Photo Challenge #14: Welcome to the Funhouse

This week I mess around with the Liquify Filter from Photoshop Elements.  I get the magazine Photo Elements Techniques bimonthly and the first article this month demonstrates using this filter...so why not try it out?  With the Liquify filter you can Warp, Twirl, Pucker, Bloat, and Shift Pixels.  Liquify can give some cool fun-house effects, but can also be used more sparingly to edit photos.  You know which tack I'm going to take!


This is my friend Al.  He and I got the chance to make mead commercially with Tim Roets at the Minnesota Harvest Orchard this fall after hours.  Al decided to be complicated and make a Black Currant Mead which required hand crushing and blending a veritable ton of red drippy fruit--and resulted in him looking like he had just committed a gory murder.  Al is a ham and foolishly posed for this picture.  The room was very dark and picture quality is very full of noise, but I did my best.


So, what better than to make Al look even more insane?  Yes please!  I used several of the Liquify Filter effects on this shot.  You may have to look at the original to see the difference (once you get past the overall Zoom Burst effect.) First I took the Twirl setting and made his squinted eye a bit more uneven and strange looking.  Next I used the Bloat setting and made his open eye bloated to a larger size--making it look very unnatural and protuberant.  And finally I used the Warp setting to push the edge of his mouth out of shape even more to give him a proper undead rictus.

One thing I discovered when using this filter was that the maximum brush size didn't get big enough for me to alter large areas of the picture, so this is more useful to change smaller areas of the photo. One can take these techniques and use them for good instead of evil.  If you have a portrait where your subject is squinting slightly, you could use the Bloat to widen the eye a bit.  You can also use the Warp to give a hint of a smile to a more serious look.  But I prefer to make my friend look even more like a terror zombie…

I didn't have much time to do more this week, so I'll cut this one short.  Feel free to play along by linking your own page with the tool below.


Next week we go back to basics with Sepia Tone!  Let's make a picture or two look olde fashioned by changing them to sepia.  Bonus credit if you can make one look beat up or otherwise actually old looking!  

Tuesday, March 3, 2015

Photo Challenge #13: Ortonize It!


After playing along with Erin's 30 Word Thursday weekly challenge on her Treasures Found Blog for the past year I have finally taken the plunge and started taking photography more seriously.  Starting with my iPhone, I soon found that the limitations of that device were getting to me.  Upgrading to a Cannon Eos Digital Rebel SL1 camera, I've started experimenting more with technique.  I have also invested in Photoshop Elements 12 and most of my post-production on photos will be from that program.  As a way to force myself to try new things, I'm doing a weekly photo challenge--each week focusing on a different photography or editing technique.  Some of these may be simple and others more difficult.  I encourage any of my readers to take part in the challenge! 


This week we will be working with The Orton Effect!  This is a technique originated by Michael Orton in the 1980's where he would sandwich two slides together--one in sharp focus and the other underexposed.  This process results in a strange and possibly dreamy or trippy effect.  Nowadays most photo editing programs can do this easily.  The trick is to find the right picture to use this on.


So here is the original photo.  I took this at Rochefort Abbey in Belgium.  We had a wonderful French/Belgian lunch in town paired with the heavenly Rochefort 6, 8, and 10 beers made just around the corner from where this shot was taken.  This was a special holiday in Belgium and the place was completely deserted.  I'm not entirely sure if we were "allowed" into this little church, but since no one was there to tell us no, we quietly and quickly entered and took some pictures.  The entire place was so peaceful and quiet that one felt like whispering.


Here is the same shot (straitened slightly) with the Orton Effect added.  The slight blur adds a dreamy effect that actually brings across the feel we had when we were on the grounds.  I like how bright colors in this effect will bleed outside their boundaries a bit: see the red from the leaves on the right side of the shot.  My wife really dislikes when I mess with photos like this (she's a photo-realistic gal) so this one goes out to her!


Next up, from the same trip, but in The Netherlands, we have the world's dirtiest swan.  This photo session was actually only the second time I had really used my camera, so I had no clue when it came to lighting, settings, etc.  It was also overcast and intermittently raining on that day, but every once in a while the sun would peak out.


For this shot I used the Orton Effect to cut the somewhat harsh look of the photo!


For next week I'm going to try using the Liquify Filter from Photoshop Elements.  I get the magazine Photo Elements Techniques bimonthly and the first article this month demonstrates using this filter...so why not!  With this filter you can Warp, Twirl, Pucker, Bloat, and Shift Pixels.  I'll either pick out one photo to demonstrate, or look for particular shots that would benefit from this effect.  Liquify can give some cool fun-house effects, but can also be used more sparingly to edit photos.  You know which tack I'm going to take!

Monday, February 23, 2015

Photo Challenge #12: I Like Them Curvy...


After playing along with Erin's 30 Word Thursday weekly challenge on her Treasures Found Blog for the past year I have finally taken the plunge and started taking photography more seriously.  Starting with my iPhone, I soon found that the limitations of that device were getting to me.  Upgrading to a Cannon Eos Digital Rebel SL1 camera, I've started experimenting more with technique.  I have also invested in Photoshop Elements 12 and most of my post-production on photos will be from that program.  As a way to force myself to try new things, I'm doing a weekly photo challenge--each week focusing on a different photography or editing technique.  Some of these may be simple and others more difficult.  I encourage any of my readers to take part in the challenge! 


I Like Them Curvy


Last week we dealt with textures and abstracts to get a different take on things.  This week we focus on a special section of Photoshop Elements (not sure if other programs have the same nomenclature) called Curves.  I have not messed with these settings at all and felt it was time to push myself to try something more unusual and new.  So much of what you can do with these photo editing programs is "under the hood" so to speak and one would never know it was in there at all until someone tells you about it.

Curves for black & white photos are used to change the light character in the picture.  One can lighten the highlights, mid-tones, or shadows to get a different effect.  Or you can darken them.  This allows for some fancy manipulation of just an isolated aspect of the photo without just darkening/lightening the entire thing with the brightness/contrast settings.  Just a little more control.  The picture I used for this looked very different on my large screen Mac at home but on the laptop really didn't look much different so I left it off.

For color photos one can do the same thing, but by taking things to the extreme settings you can get some really cool but wacky effects.


Like I said...pretty wacky!  But I like this effect.  I tried this on a few nature pictures but they looked really unnatural so I scrapped them.  Seemed to work best on structural photos with strong lines.


This was taken in Maastrict, Netherlands last spring.  The light wasn't amazing but I really like this picture.


Using the Curves setting I was able to brighten up the mid-tones adding a warmer feel and bringing out more detail in the reflections on the water.


For the final bit, I went back to a technique from a few weeks ago and Burned-In the clouds, making them a bit more dark and bringing out more detail in them.  
So there you go!  Messing with Curves to get a bit more complexity and control in your post-production.  While it is still best to take a great picture in the first place, sometimes the lighting or conditions are not perfect and you need to tweak things to get closer to what you actually saw.

Feel free to take part in the challenge and post your web/blog page below.


Next week we will be working with The Orton Effect!  This is a technique originated by Michael Orton in the 1980's where he would sandwich two slides together--one in sharp focus and the other underexposed.  This results in a strange and possibly dreamy or trippy effect.  Nowadays most photo editing programs can do this easily.  The trick is to find the right picture to use this on.  Start getting to work!

Monday, February 16, 2015

Photo Challenge #11: Abstracts & Textures


After playing along with Erin's 30 Word Thursday weekly challenge on her Treasures Found Blog for the past year I have finally taken the plunge and started taking photography more seriously.  Starting with my iPhone, I soon found that the limitations of that device were getting to me.  Upgrading to a Cannon Eos Digital Rebel SL1 camera, I've started experimenting more with technique.  I have also invested in Photoshop Elements 12 and most of my post-production on photos will be from that program.  As a way to force myself to try new things, I'm doing a weekly photo challenge--each week focusing on a different photography or editing technique.  Some of these may be simple and others more difficult.  I encourage any of my readers to take part in the challenge! 

Abstracts and Textures

This week the challenge is to get up close and personal with some textures.  With no formal art training, but growing up around a bunch of artists, I was always intrigued by different textures.  I had an aunt and an uncle who were potters, and I remember even as a child loving to hold and touch (carefully) their works.  Having now taken up the camera, I wanted to see how I could translate such a physical media into two dimensions.  I also wanted to get a different view on some familiar subjects!

Now, I realize that some of these following pictures are more Macro shots, but I think they all fulfill the idea of looking more up-close at textures and tactile appearance.


This was a tarnished iron sculpture at The Walker Sculpture Garden.  I enjoyed the pits and trails from the elements and oxidation.

This was a cool coiled rope from Fort Ligonier in PA.

Weathered wood from the Fort.  Light was fairly terrible that day, so I enhanced the contrast and light in Photoshop a bit on this one.

This was peeling paint from the garage of our B&B in Ligonier…proof that there is a photo wherever you look closely.

And last up is an old wooden park bench from the Arboretum.


So there you have it, some work on catching textures on film!  I'll be working on this more with the coming of spring and actually getting outside more to take pictures.  Some of these pictures would actually have worked well with my previous background texture challenge HERE.  As usual I have put a link below for folks to play along each week.


An InLinkz Link-up


For next week's challenge I'm going to mess around with Photoshop Elements Curves functions.  To some extent these may lead to High and Low Key effects.  We'll see how that goes!  I'll be posting that next Monday per normal.


Monday, February 9, 2015

JABlog Photo Challenge #10: Desaturate It


After playing along with Erin's 30 Word Thursday weekly challenge on her Treasures Found Blog for the past year I have finally taken the plunge and started taking photography more seriously.  Starting with my iPhone, I soon found that the limitations of that device were getting to me.  Upgrading to a Cannon Eos Digital Rebel SL1 camera, I've started experimenting more with technique.  I have also invested in Photoshop Elements 12 and most of my post-production on photos will be from that program.  As a way to force myself to try new things, I'm doing a weekly photo challenge--each week focusing on a different photography or editing technique.  Some of these may be simple and others more difficult.  I encourage any of my readers to take part in the challenge! 

Desaturate It!

This week I challenged myself (and anyone else who cares to try it) to take a colored photo and tone down the color on it for a different effect.  I tried a couple of things here and you can see the result. 


1) Bumble Bee:  This one was taken on my very first outing into the back yard with my new camera.  I hadn't messed with a non-phone camera since a high school photography class, so the picture came out very dark and sad.  However, instead of just deleting it, I used Photoshop Elements' saturation bar to cut the color and lighted it up.  The result is somewhat washed out, but has a certain charm.  I could do better if I tried this now.


2) Flowers:  This was taken during the summer.  I wanted to catch the backdrop of the colorful flowers whilst focusing in on the foreground detail of a few closer one.  It looks OK, but lacks the impact I was looking for.  By desaturating the overall picture, then highlighting one flower in the foreground I have caused the eye to be drawn to it.  I should probably crop this picture to get it into better Rule Of Thirds.


3) Butterfly:  This humble cabbage butterfly was the focus of the above shot.  I loved the vibrant purple of this flower, but the out of focus background purples draw the eye away from the star of our photo.  By cutting the saturation of the background (while keeping the color intact on the flower in the foreground) the eye stays where it should.


So there you have it!  Doing this, I realized that I want to do a similar effect but with completely cutting the background color to black & white, but I'll save that for a future challenge!

As usual, if you want to play along and post a link to your photo's, just use the handy link tool below to link your page/blog to my challenge.


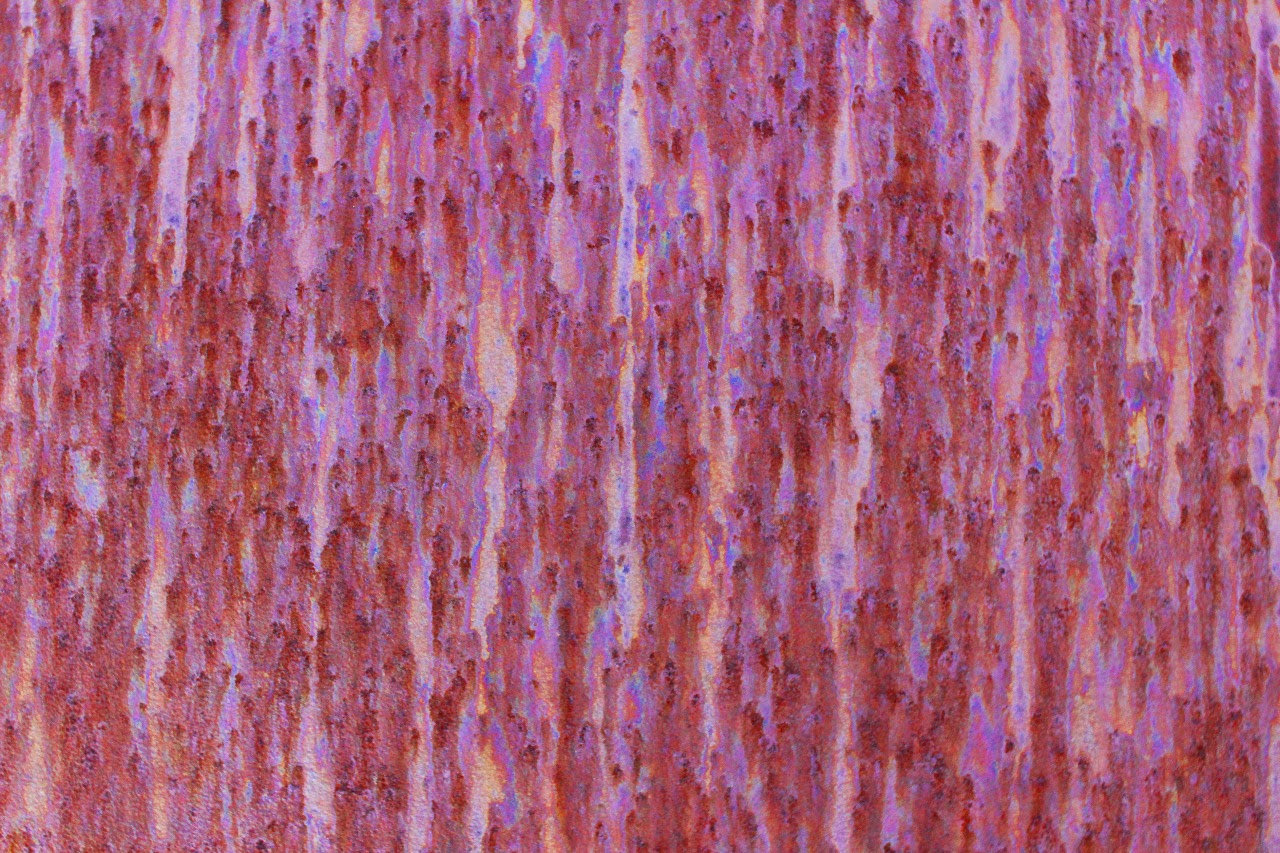
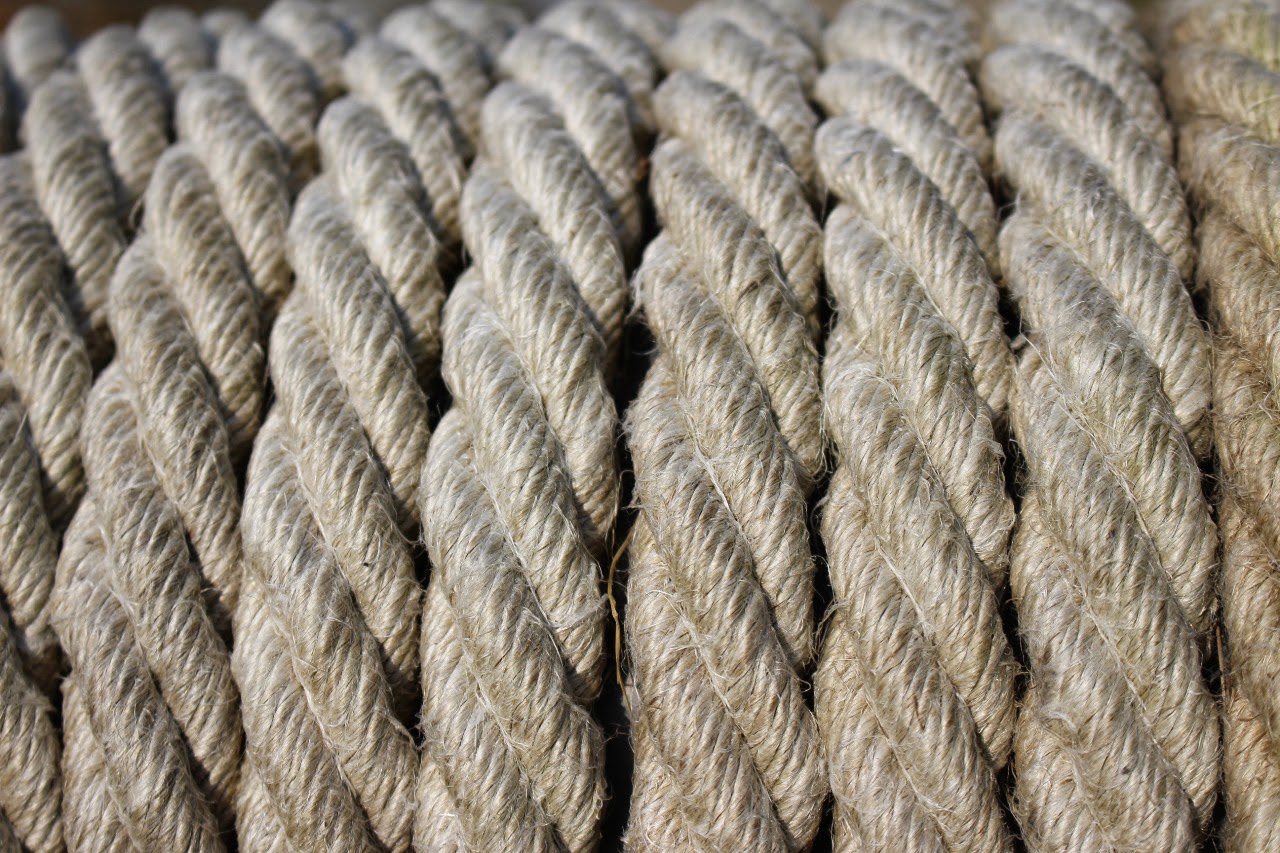
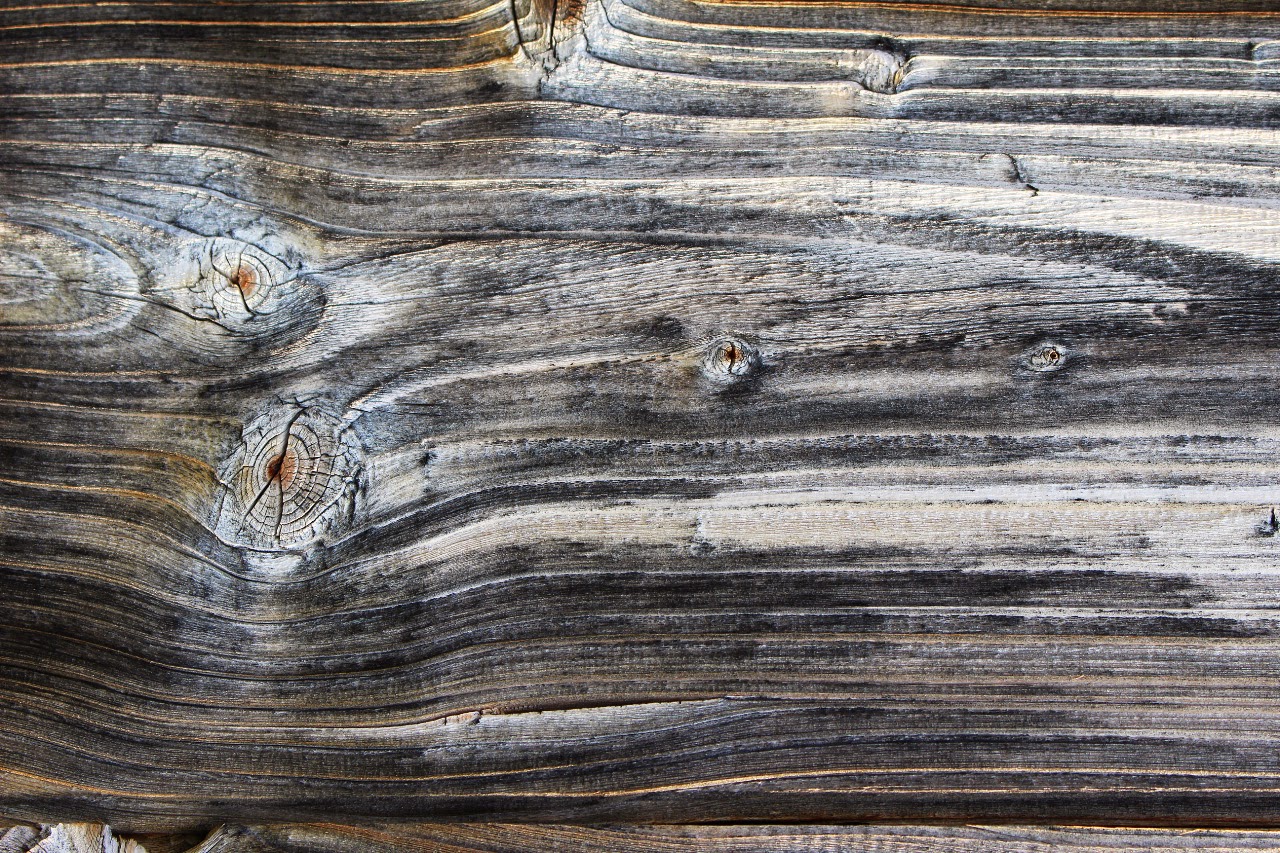
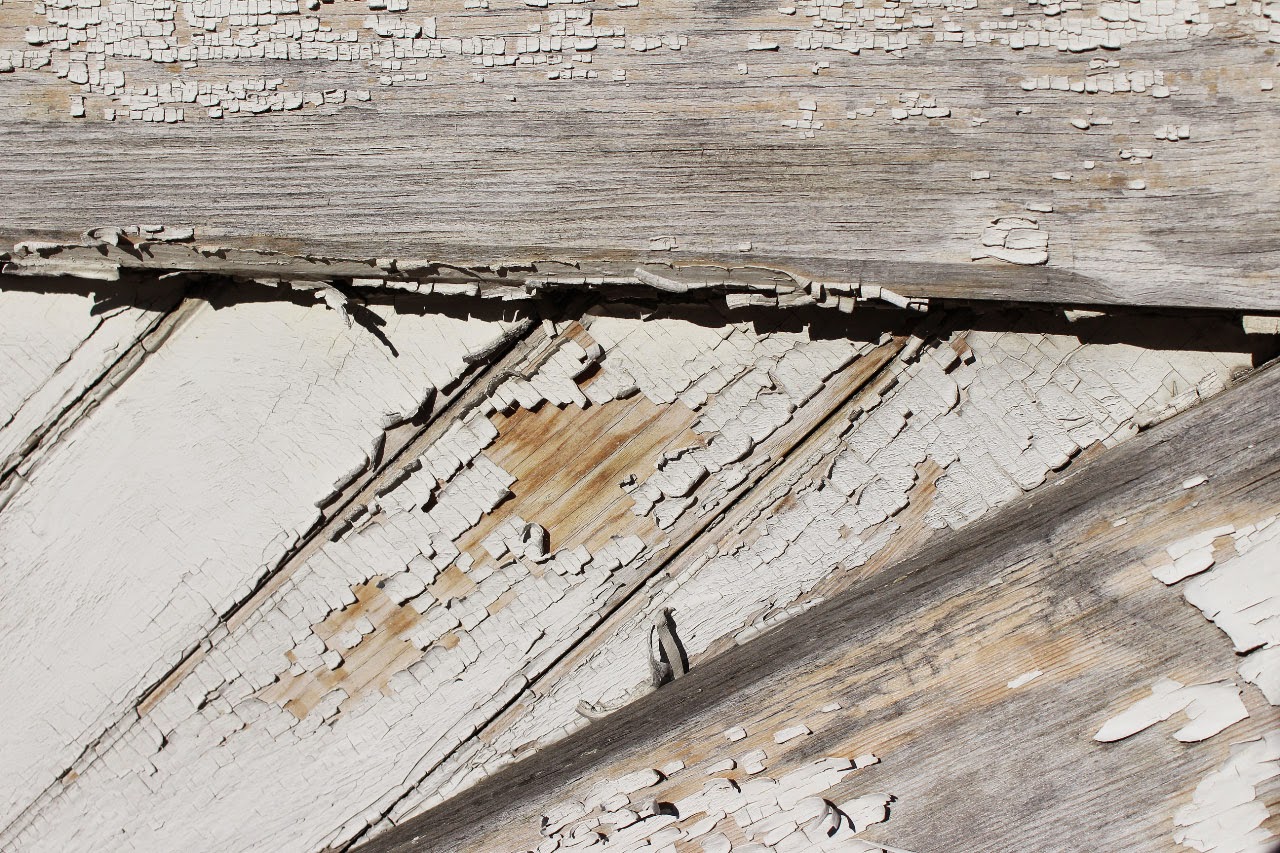
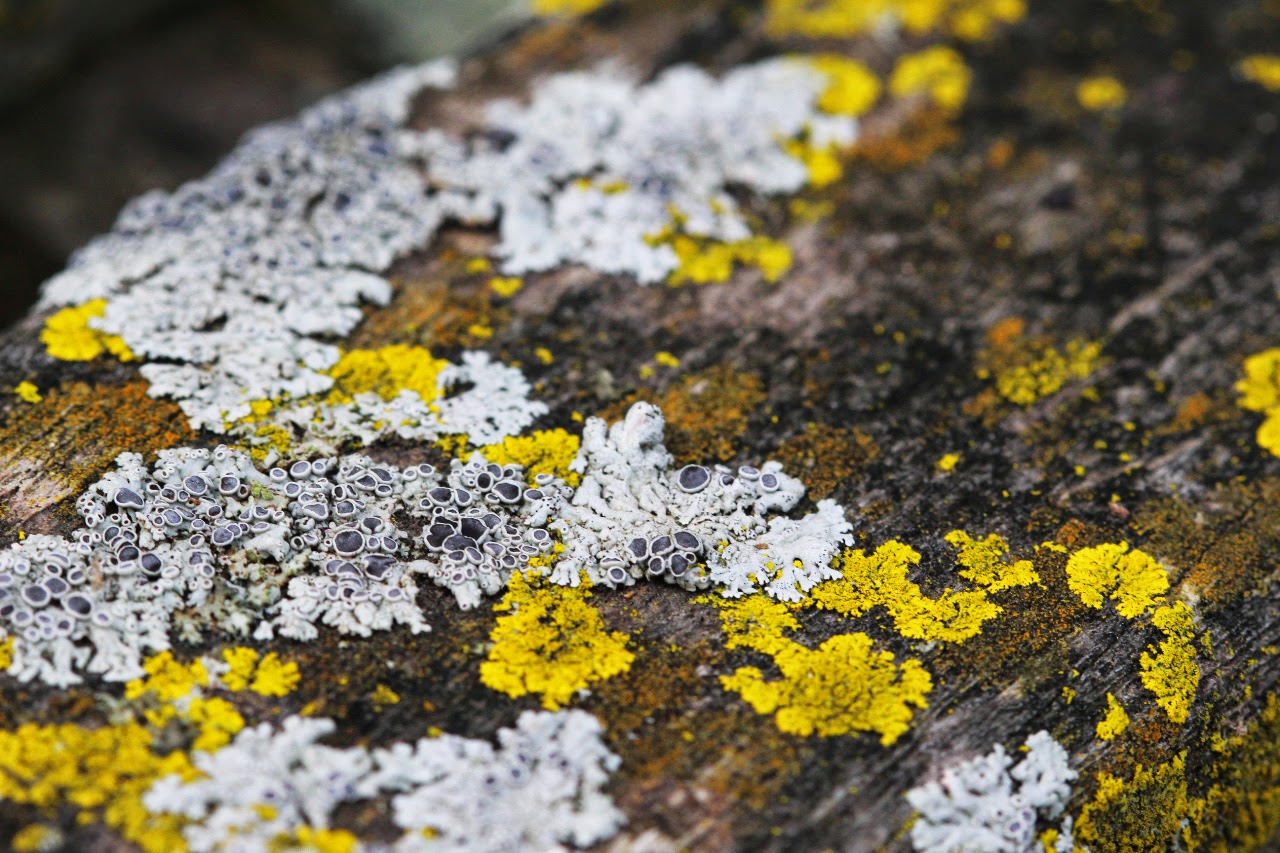
Next week, we focus in close and look at abstracts and textures.  Take a picture or three of some textures: tree bark, peeling paint, rock, etc.  Macro lenses will work best for this, but you can do it with regular lens as well.  Lets get up close and personal!  As an added bonus, the resulting pictures might make for great backgrounds and textural elements for future photos.  I'll post next Monday and leave the link up all week!